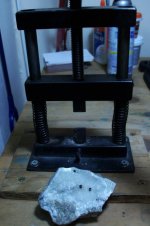
Completed rock breaker project
Below are pictures and a relatively complete explanation of what KT has now built for a rock trimmer.
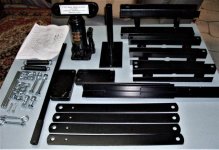
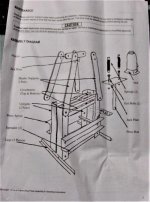
It took His Majesty two evenings in the Royal Man Cave, playing with the basic assembly because it all bolts together. So it can be a bit floppy before everything is aligned and welded!
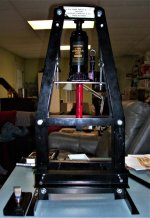
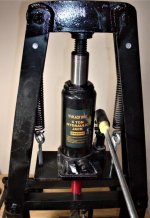
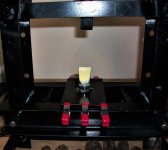
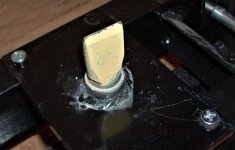
First there pictures that show the basic unit assembled and some of the modifications KT did to it.! His Majesty purchased 2 1 inch wide masonry chisels from Home Depot.! They were expensive at $17 each, one to have welded onto the vertical push bar on the bottom of the jack plate and the other to fit in a collar to be welded to a lower plate.! KT ordered the lower plate from eBay....3/8ths inch steel plate measuring 6" X 4".! Two plates came with the unit but were 1" thick and His Majesty wanted that extra 5/8ths inch of opening.! We took the first bit of parts to a welding shop and they cut the chisels off square and cut off the push bar by their total cut length (2.25"). Then had them weld one to the push rod so the chisel edge was oriented to the length of the push rod plate.! Then KT painted the push rock red so it could seen better.! And the same welder cut a 5/8th inch internal diameter steel collar from a piece of pipe for the bottom chisel to fit in.! It was a bit floppy so back at the Castle KT located a copper water pipe and cut off a 5/8th inch piece using the Royal Dremel tool, then sliced it lengthwise and cut out some of it to make a snug sleeve for the lower chisel to fit in.! Materials and labor cost was $40.! His Majesty wanted the bottom chisel where it could rotate, if needed.
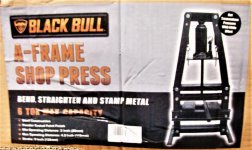
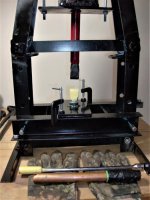
After doing a bit of measuring, we decided to leave out the middle horizontal guide bar (see the original picture on the box at the first of this thread) to gain space...and by doing so, KT can now readily fit a 4" piece of rock into the space.! When examining other people's builds of similar units of bearing presses, His Majesty had noted that several folks had left off that lower guide bar.
Then the unit was taken to a second welder!and all the bolted joints welded for increased strength and stability. He also welded the collar on the lower plate and the socket on the end of the new jack handle. This cost me $120, slightly more that the cost of the unit, but KT does not want anything loosening up with usage.!!
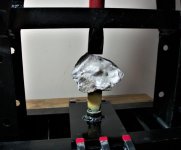
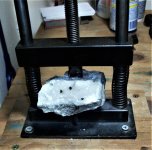
Finally, here are pictures of the upper and lower portions of the unit, a close up of the two chisel edges showing the alignment.! His Majesty made a new jack handle and pressure release pipe.! The unit came with a 30" handle and KT did not like that it was in one piece as a 30" lever might allow someone to overload the capability of the unit. Also the darned pipe did not fit the jacking mechanism hole due to a factory oversight.! The receiver was slightly egged, likely during its manufacture.! So KT found a 12 inch rachet extension and located the proper sized socket to fit in the jacking mechanism welded to the extension....that eliminated any play in the new handle.! To make a! release device, I took another piece of copper pipe and cut off 10" of it, used my dremel moto tool with an abrasive wheel to cut two slots opposite each other in the end.! Wrapped the other end with some Gorilla tape.! When His Majesty found these two items nested together, KT took a spring clip from the Royal Workshop and bolted it to the right side of the frame to store the nest handles together.
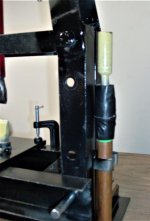
After running it up and down a couple of times, KT aligned the lower chisel in the welded collar on the lower plate (centered) to the chisel on the end of the push rod, and clamped it down with some 1" C-clamps from Home Depot....$2.25 each.! He has ordered some 2 inch spring clamps from eBay...6 for $8 and free shipping, to replace the lower C-clamps on the bottom plate...They should hold it nicely and be less in the way.! KT also C-clamped the jack to the upper push bar plate for added stability.! If there are no problems with it, then they may just be removed.
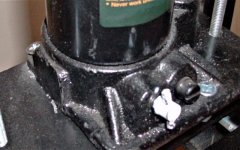
KT has already learned you do NOT want to keep any tension on the bottle jack as was done, because a small leak at the top of the jack has started.! His Majesty only had about 3 strokes of pressure, and have cleaned up the few drops that leaked, and tested the unit and it still works fine and does not leak, but would if it were left with any pressure for some time on the jack head. That is worth noting.! Finally, there are many short 12 ton and larger tonnage jacks that would fit this unit rather than trying to rebuild the seals if they do blow out.! They run about $50 for shorty hydraulic jacks on eBay.
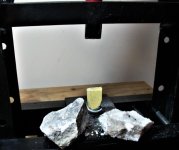
KT has slightly less that $300 in the entire breaker, a bargain considering, if available, a German Zuma, would have cost around $1000, and His Majesty was unable to find any manufacturer in the USA making a specific rock and mineral trimmer of this size.! A friend showed KT a picture of his unit, made from a 5 ton stand press and it is a box frame, but has had the same modifications done to it that KT did to this one, and his is NOT portable, whereas this one is, weighing in at around 50 pounds, and fitting readily in the back of the Royal Coach!
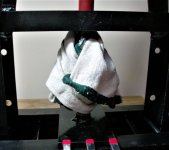
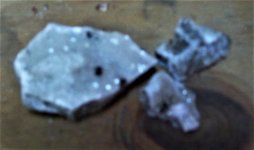
To break a rock of any size on this unit, for operator safety, it is necessary to use a dishrag or shop towel to wrap around the piece once you have it set in the jaws.! Pieces can explode out of it like grenade shrapnel if the rock is very brittle.! Also wear safety glasses.! One of my friends suggested I attach formed Plexiglas on both the front and back to prevent this, but a towel works just fine.! Also wear some work gloves because rock shards can be razor sharp for some types of quartz.
Enjoy the pictures!